The move rule will "cut" the key/value from its place in the object and will "paste" in a new place.
Example #1
The below rule will move the property father:"f" to a new position, or we could say, to a new path inside the object msg.

Node-RED msg object before the rule:

Node-RED msg object after the rule:

We can use the rule MOVE as a way to rename the key of a property. In order to do so we keep the object in the same place (same path) and use a new key in the rule.
Example #2
Rename the key "father" to "papa".

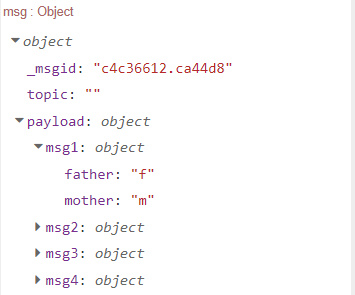
Node-RED msg object before the rule:
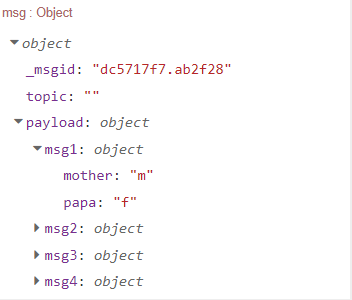
Node-RED msg object after the rule:
Example #3
Lets say we want to change the key paylo\d to be the name of the family. So how we can rename payload to Brown ?

Before the rule is applied:

After the rule is appplied:

Example #4
Be careful to not make a mistake in the rule otherwise we may end up with unexpected results. For instance, let's say you wrote a wrong rule, like the one below (trying to assign a value to the new property):
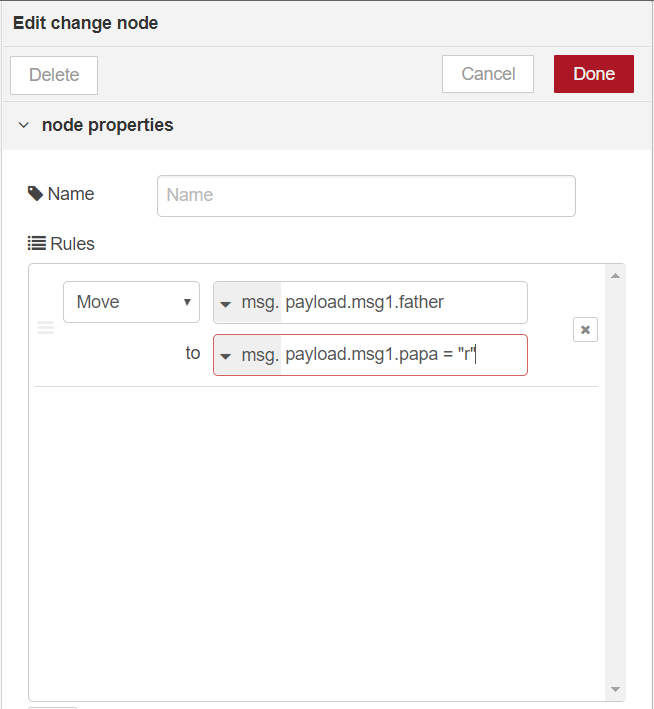
You will get the following object. Notice that the property msg.payload.msg1.father was deleted but the new one (msg.payload.msg1.papa) was not created. You will no error warnings in Node-Red debug window.

Example #5
Arrays of objects must be handled with care. See what happens when you create below rule, that move a property to itself. You may think this is harmless. Think again.

Node-RED msg object before the rule:

Node-RED msg object after the rule:

Our rule ended up deleting the property from the object. Interesting to note that the same would happen if you tried to perform such rule over the last element of the array = msg.payload.msg3.grands[3] = "J".
Example #6
See another side effect of a misused rule.

You tried to move msg.payload.msg3.grands[1] to msg.payload.msg3.grands[4]. That seemed reasonable since the first free element of the array was [4]. See the result:
Node-RED msg object before the rule:

Node-RED msg object after the rule:

You ended up with a null element in msg.payload.msg3.grands[3].