
Yes, this is
I will explain below how to setup your Node-Red environment to subscribe to a public MQTT broker server and listen to the messages that show who is calling my phone number.
So, follow these steps:
1- Create an account in FRED. This will be your Node-Red front end. It is free. Click here and select "Register NOW" or here to create your account.

2- Enter in your Node-Red instance and you will see the online Node-Red environment provided by Sense Tecnic. This is your workspace for learning Node-Red.

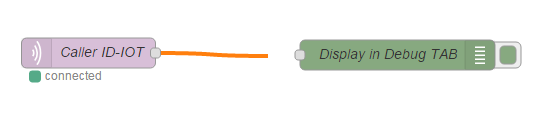
3- We will replicate the flow shown above. It has only two nodes. This is all you need to receive caller ID numbers from my phone line.
First, drag and drop an MQTT from the input panel (left side) to the canvas.

Double click this node and fill the dialog box with this information:
Topic: ocm/caller/2300
Name: Caller ID-IOT
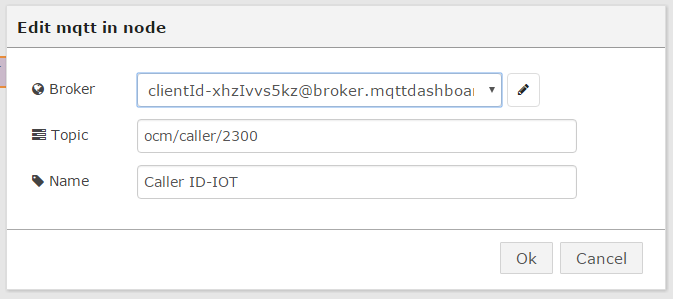
It is missing to configure the Broker field. Click on the "pencil" to edit this field and the following additional dialog box will show up:

Configure as follows:
Broker: broker.mqttdashboard.com
port: 1883
Client ID: type a random sequence of characters. Just don't use the same client ID shown in the above picture to avoid breaking my connection.
Username and Password: leave blank
If all went well then you configured a Node-Red node as an MQTT subscriber.
4- Drag and drop a debug node to the canvas. This is the very first node that appears in the left pane in the category Output.

Double click this node and fill the dialog box with this information:

The only field to change is the last one. As a matter of fact, this is not mandatory.
Name: Display in Debug TAB
5- Now, you will "wire" both nodes together. Left click the small gray box of one node, move your mouse to the gray box of the other node (keeping the mouse button pressed), and release the mouse button. You will see that the orange line will turn to gray.

6- We are done with the configuration. Now you have to click the red button Deploy to activate the configuration.

You should receive, from times to times, a message in the DEBUG tab, on the right side of your screen. These messages are coming from a public server on the internet to your browser. You setup successfully an MQTT connection. Congratulations.
