The documentation is available on GitHub: https://github.com/WarriorRocker/node-red-contrib-wio-seeed
Since the package has been uploaded to NPM he installation is as easy as typing the following command in your computer with Node-RED.
$ npm install node-red-contrib-wio-seeedBelow the results from the installation on my ODROID.
odroid@odroid:~$ nvm use 4.2.6
Now using node v4.2.6 (npm v2.14.12)
odroid@odroid:~$ node -v
v4.2.6
odroid@odroid:~$ npm -v
2.14.12
odroid@odroid:~$ npm install node-red-contrib-wio-seeed
|
> websocket@1.0.23 install /home/odroid/node_modules/node-red-contrib-wio-seeed/node_modules/websocket
> (node-gyp rebuild 2> builderror.log) || (exit 0)
make: Entrando no diretório `/home/odroid/node_modules/node-red-contrib-wio-seeed/node_modules/websocket/build'
CXX(target) Release/obj.target/bufferutil/src/bufferutil.o
SOLINK_MODULE(target) Release/obj.target/bufferutil.node
COPY Release/bufferutil.node
CXX(target) Release/obj.target/validation/src/validation.o
SOLINK_MODULE(target) Release/obj.target/validation.node
COPY Release/validation.node
make: Saindo do diretório `/home/odroid/node_modules/node-red-contrib-wio-seeed/node_modules/websocket/build'
node-red-contrib-wio-seeed@0.1.6 node_modules/node-red-contrib-wio-seeed
├── https@1.0.0
├── url@0.11.0 (punycode@1.3.2, querystring@0.2.0)
├── path@0.12.7 (process@0.11.5, util@0.10.3)
└── websocket@1.0.23 (yaeti@0.0.4, nan@2.3.5, typedarray-to-buffer@3.1.2, debug@2.2.0)
Running Node-RED after installing Wio Link package:
odroid@odroid:~$ node-red -v
Welcome to Node-RED
===================
19 Jun 22:43:58 - [info] Node-RED version: v0.13.1
19 Jun 22:43:58 - [info] Node.js version: v4.2.6
19 Jun 22:43:58 - [info] Loading palette nodes
19 Jun 22:44:03 - [warn] ------------------------------------------
19 Jun 22:44:03 - [warn] [rpi-gpio] Info : Ignoring Raspberry Pi specific node
19 Jun 22:44:03 - [warn] ------------------------------------------
19 Jun 22:44:03 - [info] Settings file : /home/odroid/.node-red/settings.js
19 Jun 22:44:03 - [info] User directory : /home/odroid/.node-red
19 Jun 22:44:03 - [info] Flows file : /home/odroid/.node-red/flows_odroid.json
19 Jun 22:44:03 - [info] Server now running at http://127.0.0.1:1880/
19 Jun 22:44:03 - [info] Starting flows
19 Jun 22:44:03 - [info] Started flows
Then opening Node-RED in the browser it is possible to see that 9 nodes have been added to the node palette.
I will test today the node SENSOR.
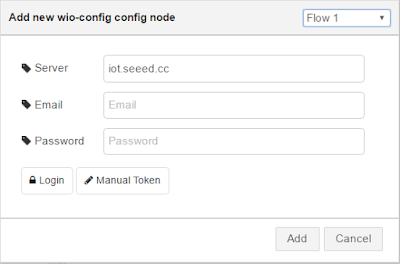
After dragging the sensor node to the flow canvas and double-clicking it the following dialog window will appear.
Next action is to enter your email and password in the respective fields. Those are the same ones that you use on the WioLink app.
When you click the button Login the node will automatically issue an http request to Wio Link exchange server and will return the following dialog box with your user token.
I just clicked the Add button to move on. A new dialog box will magically appear with the config of the Grove modules connected to your board.
It is amazing that the Port field will know what are the sensors currently connected to your board. The Method field also knows what functionality is available for each sensor.
I created then the following basic flow.
I deployed the flow and tested twice using different Output options: Parse value and Raw Object and got the following results in the debug window:
I have to say that I am impressed with the ease of use and with the smart logic that dynamically learns the sensors that are connected to the board as well as the methods available for each sensor.


No comments:
Post a Comment